Linux Network Isolation: Beyond the Docker Abstraction
This post is part of the Container Networking From Scratch series — follow a packet’s path through the Linux kernel, from namespaces to NAT.
Most DevOps engineers use containers every day without truly understanding how the Linux kernel isolates networking. If you cannot explain exactly how a packet leaves a container and reaches the physical network interface, you are guessing when production networking fails.
This guide removes Docker and Kubernetes from the picture and builds everything directly using Linux primitives.
The Illusion of the Container
There is no such thing as a “container” inside the Linux kernel.
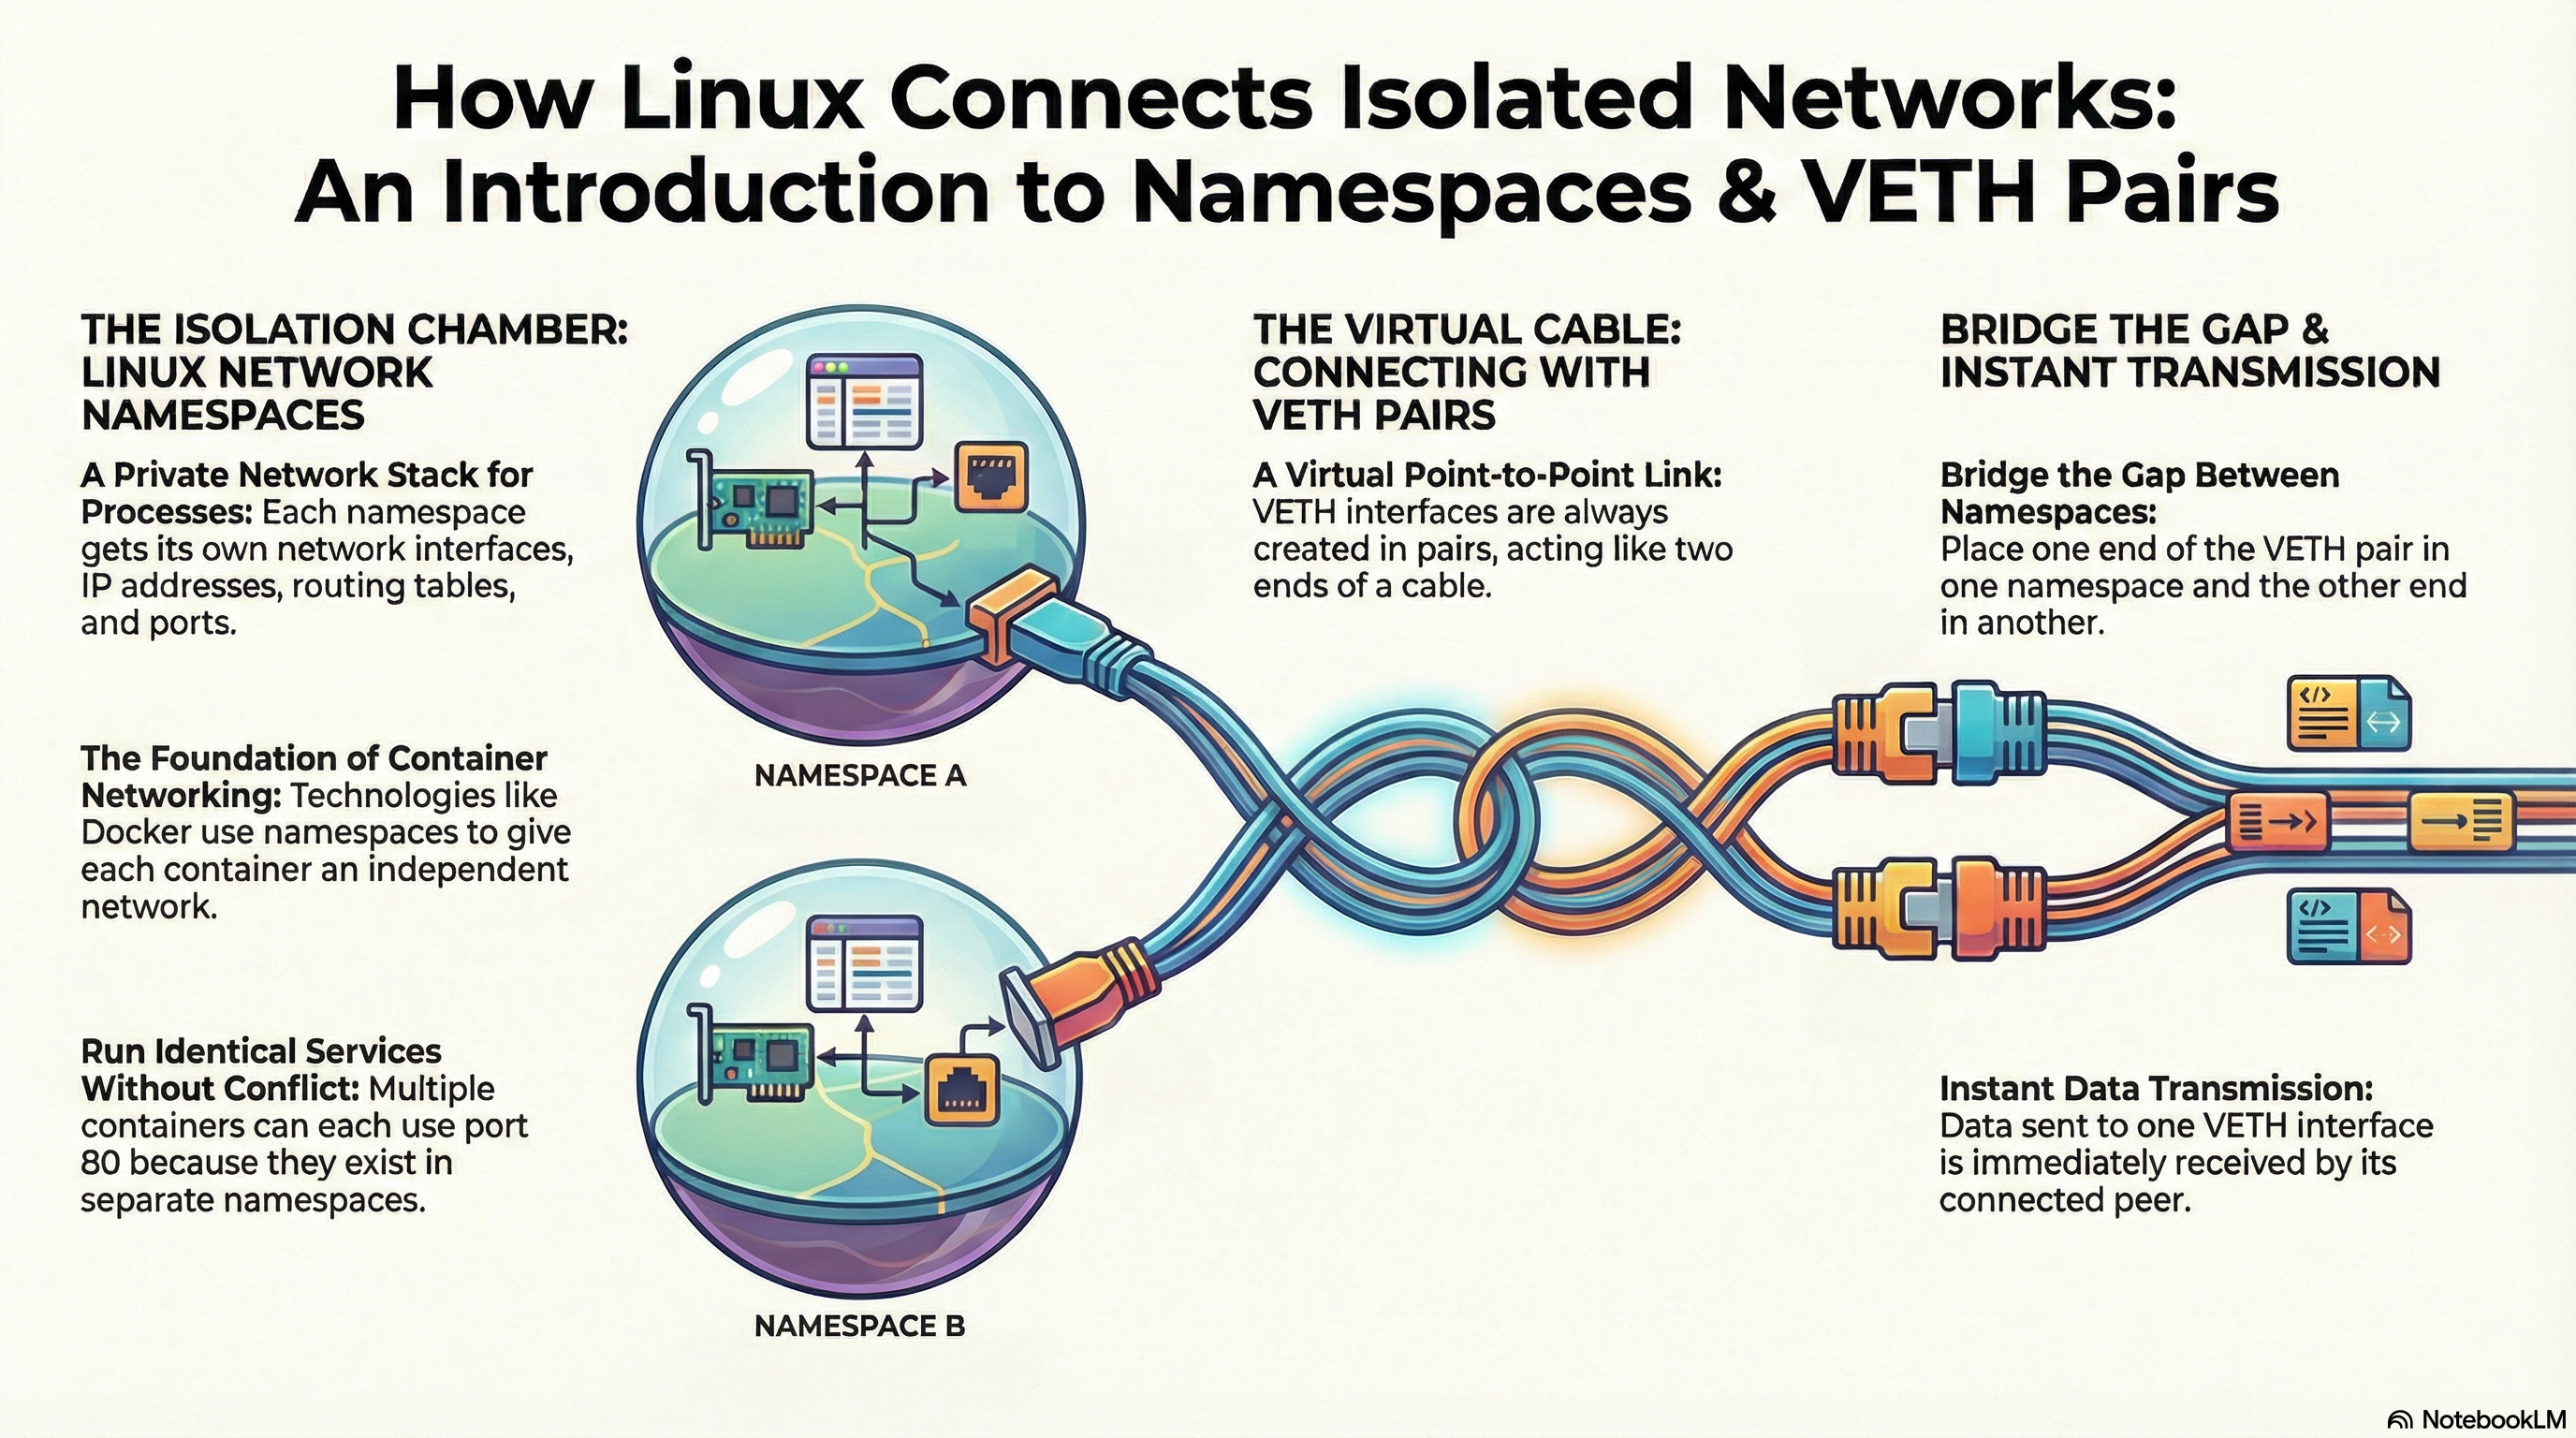
A container is simply a combination of isolation features. The most important one for networking is the Network Namespace.
When you run a microservice, it appears to have:
- Its own IP address
- Its own routing table
- Its own firewall rules
- Its own network interfaces
This is not magic. It is a logical partition of the kernel network stack.
Without network namespaces:
- Every process would compete for port 80 or 443
- You could not run multiple web servers on one machine
- One misconfigured process could sniff all host traffic
Network namespaces virtualize the entire network stack.
Each namespace gets:
- Its own
lointerface - Its own
eth0 - Its own routing table
- Its own iptables rules
But isolation creates a problem:
If a process is fully isolated, it has no connection to the outside world.
To solve this, Linux provides a virtual cable called a VETH pair.
Setting Up the Laboratory
We will use a clean Ubuntu 24.04 system.
Install required tools:
$ sudo apt update
$ sudo apt install -y iproute2 tcpdump bridge-utils
Verify:
$ ip -V
ip utility, iproute2-6.x.x

$ tcpdump --version
tcpdump version 4.x.x
We are now ready to build networking manually.
Building the Network From Scratch
Step 1 — Create a Namespace
Create namespace ns1:
$ sudo ip netns add ns1Verify:
$ sudo ip netns list
ns1
Internally, the kernel creates:
/var/run/netns/ns1Step 2 — Inspect the Empty Namespace
Run inside namespace:
$ sudo ip netns exec ns1 ip linkOutput:
1: lo: <LOOPBACK> mtu 65536 state DOWN mode DEFAULT group defaultNotice:
- Only loopback exists
- It is DOWN
- No
eth0 - No IP addresses
Check addresses:
$ sudo ip netns exec ns1 ip -br addrOutput:
lo UNKNOWN 127.0.0.1/8 ::1/128Try internet:
$ sudo ip netns exec ns1 ping -c 1 8.8.8.8Output:
connect: Network is unreachableThis namespace is completely isolated.
Creating the Virtual Cable (VETH Pair)
Create VETH pair:
$ sudo ip link add veth1 type veth peer name veth2Check on host:
$ ip -br linkExample:
lo               UNKNOWN
eth0             UP
veth1@veth2      DOWN
veth2@veth1      DOWN
Explanation:
- This is one virtual cable.
veth1is connected toveth2.- The
@symbol shows the peer.
At this moment, both ends live in the host namespace.
Moving One End into the Namespace
Move veth2 into ns1:
$ sudo ip link set veth2 netns ns1Now check host:
$ ip -br linkOutput:
lo               UNKNOWN
eth0             UP
veth1@if12       DOWN
Notice:
veth2disappeared- Now shown as
veth1@if12
The Ghost in the Machine: ifindex
Each interface has a unique ID called ifindex.
Check detailed output:
$ ip link show veth1Example:
7: veth1@if12: <BROADCAST,MULTICAST> mtu 1500 state DOWN mode DEFAULTWhen the peer is in another namespace:
- Linux hides its name
- But keeps the interface index
In production debugging, you match these index numbers to find which container owns which veth pair.
Activating the Data Path
A cable alone is not enough.
We need:
- Interfaces UP
- IP addresses assigned
Configure Inside ns1
Rename interface:
$ sudo ip netns exec ns1 ip link set veth2 name eth1000Bring loopback up:
$ sudo ip netns exec ns1 ip link set lo upBring interface up:
$ sudo ip netns exec ns1 ip link set eth1000 upAssign IP:
$ sudo ip netns exec ns1 ip addr add 10.66.77.24/24 dev eth1000Verify:
$ sudo ip netns exec ns1 ip -br addrOutput:
lo               UNKNOWN        127.0.0.1/8 ::1/128
eth1000          UP             10.66.77.24/24
Configure Host Side
Bring up:
$ sudo ip link set veth1 upAssign IP:
$ sudo ip addr add 10.66.77.25/24 dev veth1Verify:
$ ip -br addrExample:
lo               UNKNOWN        127.0.0.1/8 ::1/128
eth0             UP             192.168.1.10/24
veth1            UP             10.66.77.25/24
Proving Packet Flow
Open terminal 1:
$ sudo tcpdump -i veth1 icmpOpen terminal 2:
$ sudo ip netns exec ns1 ping 10.66.77.25tcpdump output:
IP 10.66.77.24 > 10.66.77.25: ICMP echo request
IP 10.66.77.25 > 10.66.77.24: ICMP echo reply
What happened internally:
- Packet generated in namespace
- Routed to
eth1000 - Enters VETH driver
- Kernel copies packet to
veth1 - Host receives it
This is the exact mechanism Docker relies on.
Creating Two Isolated Worlds
Create second namespace:
$ sudo ip netns add ns2You can create another VETH pair and move each side into different namespaces.
Now two isolated environments communicate directly, while the host only stores the packet in kernel memory.
The Docker Disconnect
On a Docker host:
$ ip netns listUsually shows nothing.
Docker stores namespaces in:
/var/run/docker/netns/The ip netns command checks:
/var/run/netns/To inspect Docker namespaces manually, you must create symbolic links.
Docker hides them to control lifecycle management.
Production Reality: Star Topology
In real environments:
- Host creates a Linux bridge (example:
docker0) - Each container VETH connects to that bridge
Check:
$ ip link show docker0Example:
3: docker0: <BROADCAST,MULTICAST,UP> mtu 1500 state UPThis forms a star topology.
Performance Considerations
VETH is fast because:
- It is memory-to-memory copy inside kernel
But:
- Every namespace crossing re-enters the network stack
- Adds latency
- Adds ARP entries
- Adds routing entries
Check neighbor table:
$ ip neigh | wc -lIn large Kubernetes nodes, you may see:
No buffer space availableThis means kernel tables are exhausted.
Hardening the Stack
Namespace isolation means:
- Cannot see host interfaces
- Cannot sniff other container traffic
But kernel and hardware are still shared.
Check firewall rules inside namespace:
$ sudo ip netns exec ns1 iptables -LSecurity must exist:
- Inside namespace
- On host
Isolation is not full virtualization.
Core Mental Model
Think of:
Network Namespace = private network configuration inside kernel memory VETH pair = pipe between namespaces
When you run:
$ ping 10.66.77.25The kernel:
- Reads routing table in current namespace
- Sends packet into VETH
- Immediately delivers to peer
- Processes packet in other namespace
This is how containers work internally.
Cleanup
Delete namespace:
$ sudo ip netns delete ns1
$ sudo ip netns delete ns2
Delete interfaces if needed:
$ sudo ip link delete veth1Verify:
$ ip netns listNo output means cleanup successful.
Conclusion
You manually built:
- Network namespaces
- VETH pairs
- IP routing
- Packet tracing
This is the foundation of:
- Docker networking
- Kubernetes networking
- Container isolation
When networking fails in production, understanding these primitives allows you to debug at the kernel level instead of restarting services blindly.
If you master this mental model, you stop being dependent on tools and start understanding how Linux actually moves packets.